ODYSSEY INSTRUCTION MANUAL Section 2
III. CHOOSING GLASS
Without a doubt, the single most important factor determining how good your finished lampshade will look is your choice of glass. A craftsman using cheap, monochromatic, flat-looking glass can employ the most careful technical workmanship and he will still wind up with a cheap looking lamp. On the other hand, a lampshade exhibiting only mediocre workmanship will be breathtaking if the glass is good and skillfully used.
The glass used in Tiffany lamps is almost always opalescent, at least to some degree. Opalescent glass is differentiated from what is known as cathedral glass by the presence of a chemical agent in the glass that scatters light. This characteristic is significant to the lamp maker because he is working around a single light source rather than a diffuse light source (such as the sky). A lampshade made of cathedral glass will only light up in the area directly in front of the light bulb. The rest of the shade will appear much darker or even black. The diffusing characteristic of opalescent glass makes the whole lampshade light up, regardless of where you view it from. In short, don't use cathedral glass in your lampshade unless you especially want the effect it gives.
Opalescent glass is available in a variety of opacities, colors and textures. Think in terms of what you are trying to represent when choosing glass for your lampshade. In general, solid objects look best in glass with at least moderate opacity, to give the impression that they are solid. Background areas lend themselves to a more transparent glass, often incorporating texture and/or fractures to help scatter the light. Backgrounds also usually look best when done in a cool color (the blue, green, purple range) that is more muted than the foliage in front of them. This does not apply to geometric backgrounds such as in the Pansy, Black-eyed Susan, Poinsettia, etc. These may be fairly opaque and often look good in warmer tones (amber, for example).
Choose your glass for the depth, richness and complexity it exhibits as well as its color. The lamp-maker is an artist whose palette is the glass he is working with. The richer and more interesting his palette is, the better the lamp he paints will be. The amount of glass required to complete any particular lampshade depends on more than just how big it is. If your glass is monochromatic, and the cuts are fairly simple, three times the surface area of the shade should be adequate. Factors
such as cutting skill, intricate shapes, color shading and glass cuttability all affect the amount of glass that will be required. Estimating your needs becomes more difficult the more you demand from your work. Sometimes 15 to 20 times the area may be necessary! In any event, buy all you need before you start, because there's nothing more frustrating than running out of a particular glass only to discover that your supplier has run out too!
IV. CUTTING
TOOLS REQUIRED
 Glass Cutter Breaking Pliers
Grozing Pliers Glass Grinder
Light Table
Cutting is pretty straightforward. Questions regarding the type of glass cutter to use, how to hold it, and whether to cut against the pattern or mark around it with a felt pen are all matters of personal choice. Results are what count!
All glass should be cut out to match the shape of the Mylar pattern, and not the shape inscribed on the mold. The engraved lines on the mold are used to position the glass pieces correctly and not to define their exact contour.
Cut as close to the pattern as possible, but do not go any further. It is not necessary to grind the pieces to exactly match the pattern; any little
flashing or bumps should be left and removed, if necessary, during the fitting operation.
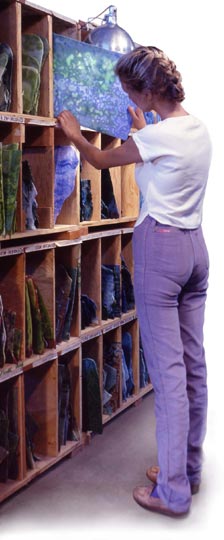
If you have access to a light table, it can be a big help in selecting the particular part of a sheet of glass to use, as well as seeing how all the glasspieces you have cut work together. The light table should be illuminated by light bulbs rather than florescent tubes, as incandescent light will be your ultimate light source. Incandescent light is somewhat warmer in color than either florescent light or daylight and glass will transmit different colors in each. We have found that the wattage necessary to properly illuminate glass on a light table is far greater than the wattage required to illuminate the lampshade when it's finished. 100 watts per square foot of light table surface is a good rule of thumb to follow. The glass covering the light table should be clear, because frosted glass will change the apparent opacity of your glass, as well as obscuring some of the subtler effects.
V. FITTING
TOOLS REQUIRED
Tacky Wax-at least 1/2 lb.
Large tin can or double boiler
Inexpensive natural-bristle paint brush, 1" to 1 1/2" wide
The fitting process should be started only after all the glass for your lamp is cut. If this is your first
Odyssey lamp, you may have already fit a few pieces to check your pattern sizes, but it's not necessary or advisable to continue checking the fit of each piece as it is cut. The flexibility of the waxing system will save you a lot of unnecessary work later on by requiring you to trim only those pieces that interfere with the fit. We know this sounds a bit risky, but trust us!
Waxing the Mold
The pieces of glass are held on the mold by a thin coating of melted Tacky Wax brushed onto the mold. The quantity of wax needed to adequately coat the mold varies from about 1/8 lb. for a 16 dome up to 1/2 lb. for a 28" dome. Melt more wax than you will need since the extra can be conveniently saved for your next project. In any case, set aside at least one stick (2 oz.) for other uses which will be described later.
Melt the wax in a double boiler or tin can, and continue heating it until it reaches a temperature of about 240° F. You may want to use a candy thermometer the first few times to get the feel of it. (Don't worry, the wax will not poison your next batch of fudge as it is no more toxic than paraffin. But use caution! This wax is flammable like paraffin, and can ignite spontaneously if heated over 400°F.) The wax is then brushed onto the mold with your bristle paint brush, using
long, even strokes. The brush must be made from only natural bristles, as plastic or nylon bristles can't take the heat. One smooth coat is all that is necessary. If the wax is not hot enough, the coating will be too thick or "cakey" when applied. Overheating, on the other hand, will produce a thin, runny coat and might even fry the natural bristles of your brush.
After waxing, the mold should be covered with a plastic garbage bag between fitting sessions to prevent it from collecting grease and dust out of the air. The wax is non-drying, so, protected in this way, it will lose none of its tackiness with time.
Fitting
TOOLS REQUIRED
Grozing Pliers
Glass Grinder or Sander
Odyssey Ring
Begin fitting the glass pieces onto your waxed mold, starting from the top down. First make sure the recess at the top of the mold is free of any obstructions, so that the ring sits flat and level on the mold. Then center your Odyssey ring in the recess and use it to position your upper row of glass. Do not rely on the edge of the recess itself to position the glass, as it is a little larger than the actual ring. The glass should adhere to the waxed mold by applying only gentle pressure. If it won't stick, the glass is probably a little greasy and
will help "set" the glass pieces. Large glass pieces (such as Dragonfly wings or Hydrangea blossoms) can be held more securely in place by the addition needs to be cleaned. Often a slight twisting motion of 2 or 3 balls of Tacky Wax underneath their edges.
The glass pieces should fit fairly snugly together on the mold, but should not have to be crammed into place. Remember that you need a little room to accommodate the foil, so there should be some space between pieces. 1/32" to 1/64" is ideal, with 1/16" being the maximum allowable gap. If the gap is larger than this in some places, move pieces around slightly to distribute the gap over a wider area. Use your grinder and grozing pliers to trim the glass only in places where it prevents pieces from fitting correctly on the mold. Remember that your patterns and mold lines are only guides to help you. In the end, how your lamp fits on the mold is all that really matters.
On the other hand, don't get so sloppy that you lose the sense of what you are trying to represent. Border rows and geometric back grounds should be kept straight and regular. Stem and leaf lines should not become jagged or wobbly when they aren't supposed to look that way. Most flower petals have rounded contours and should not be left with angular corners in inappropriate places, even though they might fit OK on the mold.
Removing Glass from the Mold for Foiling
In general, when trimming glass to go on the mold, remember the sense of what you are trying to represent and how all of the pieces are going to appear with lead lines around them.
VI. FOILING
TOOLS REQUIRED
Copper Foil in a variety of widths
Xacto Knife
Straight Edge
Pointed Prying Tool
Foil your lamp by removing the glass pieces one at a time, foiling them and replacing them on the mold. A sturdy pointed tool, thin enough to fit
between the pieces, is useful to help pry small pieces loose from the wax. We find that old dental tools, ground to a straight (but not sharp) point on the end, are ideal for this purpose.Choose a width of foil that will give you between 1/64" and 1/32" equal overlap on both the front and back surfaces of the glass. This is all that is necessary to hold the glass piece securely in place and provide adequate structural strength for the lamp. The amount of overlap is determined by the gap between glass pieces and the size of the pieces. For aesthetic reasons the resultant lead line should range from 3/32" to 1/8" in width, with slightly broader lead lines acceptable for lamps with very large pieces (such as the Hydrangea) and narrower lead lines permissible for small piece designs (such as the Wisteria and Laburnum). If your cutting has resulted in wide gaps between pieces, you should foil with a minimum of overlap to avoid ending up with very wide lead lines. Wide lead lines look bad. Because foil comes in only limited widths, it may be necessary at times to trim the edges of a length of foil using an X-Acto knife and straight edge or a pair scissors.
Foiling Tips:
![]() Use a smooth-surfaced metal tool (such as a burnisher or ice pick) to press the foil down flat on both the front and back surfaces of the glass. Foil
Use a smooth-surfaced metal tool (such as a burnisher or ice pick) to press the foil down flat on both the front and back surfaces of the glass. Foil
Foiling the Glass
not pressed down flat will result in rough lead lines, in addition to leaving a place for residual flux and wax to hide, which may later interfere with your patina. Be sure the tool you use for this is hard and smooth, so that it doesn't tear the foil.
![]() Begin and end your foil strip on the sharpest corner of the glass piece. No overlap is necessary.
Begin and end your foil strip on the sharpest corner of the glass piece. No overlap is necessary.
Don't start foiling on the center of a smooth edge because you will create a jagged edge in the lead line if your foil doesn't line up perfectly.
![]() For glass pieces along the ring or rim edge, do not start the foil along the exposed edge (even at the corner). An unsecured end may become loose and separate later during the soldering or shade
For glass pieces along the ring or rim edge, do not start the foil along the exposed edge (even at the corner). An unsecured end may become loose and separate later during the soldering or shade
removal operations.
![]() Foiling glass pieces of non-uniform thickness (such as ripple or drapery) presents special problems. Most ripple glass can be foiled with a standard foil width that overlaps a little too much in the valleys and doesn't quite make it over the ridges. Occasional splitting of the foil on the overlap in the valleys is to be expected and is acceptable. When the glass is extremely variable in thickness (such as 1/2" thick drapery!) use a foil width appropriate for the thinner areas, and augment it with short strips to get overlap in the thick areas.
Foiling glass pieces of non-uniform thickness (such as ripple or drapery) presents special problems. Most ripple glass can be foiled with a standard foil width that overlaps a little too much in the valleys and doesn't quite make it over the ridges. Occasional splitting of the foil on the overlap in the valleys is to be expected and is acceptable. When the glass is extremely variable in thickness (such as 1/2" thick drapery!) use a foil width appropriate for the thinner areas, and augment it with short strips to get overlap in the thick areas.
VII. SOLDERING PREPARATION
The soldering step is the point where all those pieces you cut, fit and foiled are finally joined together into a lampshade. Once the lamp is soldered together, it is difficult to replace pieces or make changes so, before starting, check to see that everything is exactly where you want it to be on the mold.
Look for the following:
![]() Large gaps between pieces. Shove adjacent pieces around to spread out the gap.
Large gaps between pieces. Shove adjacent pieces around to spread out the gap.
![]() Disturbed foil. The foil may have become unstuck or been crammed out of place accidentally during foiling. Fix it now.
Disturbed foil. The foil may have become unstuck or been crammed out of place accidentally during foiling. Fix it now.
![]() Surface regularity. All pieces should be flat on the mold, creating a smooth, regular surface. Where large or thick glass pieces protrude too much, place balls of Tacky Wax under the adjacent pieces to bring them up to the correct level. In those instances where a piece is so large and thick that raising the surface to accommodate it distorts the shape of the shade, it is advisable to remove the piece and set it in after the shade is released from the mold. This should not be done in cases where the piece is expected to protrude above the surface, such as dragonfly wings or drapery glass.
Surface regularity. All pieces should be flat on the mold, creating a smooth, regular surface. Where large or thick glass pieces protrude too much, place balls of Tacky Wax under the adjacent pieces to bring them up to the correct level. In those instances where a piece is so large and thick that raising the surface to accommodate it distorts the shape of the shade, it is advisable to remove the piece and set it in after the shade is released from the mold. This should not be done in cases where the piece is expected to protrude above the surface, such as dragonfly wings or drapery glass.
![]() Straight geometric lines. Be especially careful that the pieces in border rows and grid work areas are aligned so as to yield straight, regular lead lines. Trim foil edges if necessary to make the bead width consistent along its entire length. Nothing looks worse than lead lines that are wobbly or uneven when they should be straight.
Straight geometric lines. Be especially careful that the pieces in border rows and grid work areas are aligned so as to yield straight, regular lead lines. Trim foil edges if necessary to make the bead width consistent along its entire length. Nothing looks worse than lead lines that are wobbly or uneven when they should be straight.
![]() Consistent outlines on multi-piece shapes. For example, the outside contour of a leaf or stem should appear continuous when it is broken up into two or more pieces.
Consistent outlines on multi-piece shapes. For example, the outside contour of a leaf or stem should appear continuous when it is broken up into two or more pieces.
Your soldering work area should be well lit and well ventilated. If there is little or no air movement in the room, use a fan to keep the soldering fumes away from your face. You will need to position your
lamp at many different angles, so some means of keeping it stable is a necessity. A lamp leveling device is perfect for this, but a few appropriately-sized cardboard boxes will also work satisfactorily.
The soldering of your shade should be done in a definite sequence, as follows:
1. Tin the outside of the shade.
2. Release the shade from the mold.
3. Install the ring and rim.
4. Tin and bead the inside of the shade.
5. Bead the outside of the shade.
Continued in Section 3
Return to Section 1